Search This Blog

Translate

Monday, July 9, 2012

A-Line Floral Skirt with Frills

I made this skirt yesterday using a simple A-line skirt draft. I attached the red satin ribbon and frill trim to add grace to the floral skirt. The frill trim is a store-bought one. So it made my work easier.


Does the skirt look good with the frill trim or should it have been better left plain? Please post your replies. I am eager to read your comments and feedback.

You can find lots of free PDF printable sewing patterns on this page on my blog. You can download and use them to create your own clothes.

You can also click the Free Sewing Patterns Page at the top of this blog page (under the blog title) to find more free sewing patterns.

Click the below links to browse through all the pattern drafting and sewing tutorials on my blog.


sewing tutorials  


Thursday, July 5, 2012

A Ruched Sundress for My Little Girl


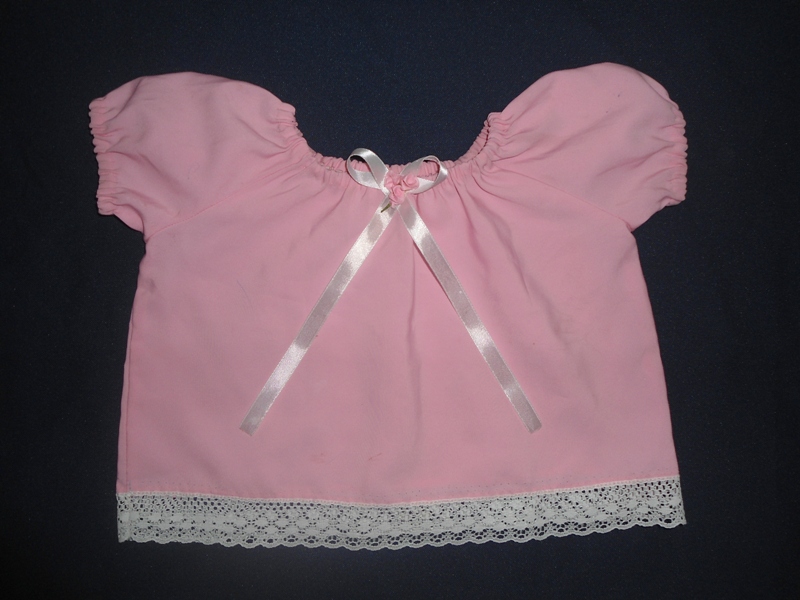
I made this empire-waist sundress for my little girl today. The pattern is self-drafted. I did some ruching at the center front. The straps cross at the back. First, I thought of attaching a red or orange satin ribbon at the empire line, but then I settled in with the lace trim to give a soft look to the dress.


Here are some action shots. I took these photos before attaching the lace trim on the bottom hemline of the dress.


I purchased some cotton fabrics from a fabric bazaar recently to make summer dresses or skirts for my daughter. As I already have loads of cotton fabrics, I purchased only a few. I made the above-mentioned sundress from one of the fabrics you see in the image below. The lavender-colored floral fabric is for my friend's daughter. This type of cotton fabric is so soft and perfect for summer.


Lots of sewing ahead! I would love to see what you are making now. Please feel free to comment and leave a link to your blog, so that I will be able to visit your blogs too.

I have linked this to the link party on Happy Hour Projects.


You can find lots of free PDF printable sewing patterns on this page on my blog. You can download and use them to create your own clothes.

You can also click the Free Sewing Patterns Page at the top of this blog page (under the blog title) to find more free sewing patterns.

Click the below links to browse through all the pattern drafting and sewing tutorials on my blog.


Monday, July 2, 2012

Tutorial---How to Draft and Sew a Peasant Blouse


The peasant blouse or peasant top is very easy to draft and sew. It's pattern draft is based on the basic blouse pattern. A raglan style sleeve (a sleeve that begins at the neckline and has a diagonal (sloping) seam line that ends at the armhole) is used in this top.

Pattern draft:

Front:


A to B = Blouse length
A to C = Neck depth
A to D = 1/8 bust + 2.5 inches (or 1/4 bust - 1 or scye depth, i.e., armhole depth)
D to E = 1/4 bust + 0.75-inch ease (ease can be reduced when you use stretchy fabrics to sew this top)
B to F is same as D to E or plus 2 inches (4 inch for women's size) if you want flare at the hemline.
A to I = Half shoulder width
H to I = 1 inch (reduce this to 0.50 inch or 0.75 inch for kids' sizes)
H to G = shoulder width you prefer for the blouse
(or A to G = bust/12 + 0.25 inch or the measurement from the center of the neck to where you want your blouse's neckline to sit on the shoulder at neck.) 
HE is the armhole curve, which is not required here.
Shape the front neckline GC.
Connect A and E. Mark point N where the line AE meets the neckline.
Draw a vertical line from I which meets DE at point J.
Mark point K 0.5 inch from J. Shape EKN.
C to L = B to M = 2 inches (for more fullness, you can increase this measure as per your preference.)


LM is where you keep the fold in the fabric when you cut the front piece.


Back:


Same as front except for this change: Mark point K 1 inch from J. Shape EKN.

LM is where you keep the fold in the fabric when you cut the back piece.


Sleeve:


A to B = 1/8 bust + 2.5 inches (or 1/4 bust - 1 or scye depth, i.e., armhole depth)
A to C = Neck depth
A to O = Half shoulder
A to D = A to G of the front blouse draft
B to F = 1/4 bust + 0.75-inch ease (the same ease you kept for the front draft) 
Draw a vertical line from O which meets BF at point P.
Connect A and F. Mark point Q where the line AF meets the neckline.
Mark point G where lines OP and AF cross.
G to I = 0.5 inch
G to H = 1 inch
Shape sleeve front armhole FHQ and back armhole FIQ.
D to L = Length of the sleeve from the D plus 2 to 3 inches for fullness at the arm round of the puffed sleeve. 

K to L = D to J = 2 inches for the fullness at the armhole of the puffed sleeve.
Join K and J.
L to N = Half sleeve round
Join F and N.
N to M = 0.75 inch
Join L and M with a curved line.

JK is where you keep the fold in the fabric when you cut the sleeve pieces.


Cut the front, back and sleeve pattern pieces on fold.


Add seam allowances:

For blouse front and back:

0.375 inch at the armhole.
1 inch at neck for casing for the elastic.
0.5 inch or 1 inch on the sides.
1 inch at the blouse bottom hemline.

For sleeves:

0.375 inch at the sleeve cap.
0.5 inch or 1 inch on the sides.
1 inch at the sleeve hemline.


Sewing:

Step 1: Arrange the front, back, and sleeve pattern pieces.


Step 2: Join the sleeves with the front and back bodices:

With right sides facing, join the sleeves with the front and back bodices.


Step 3: Join the sides.


Step 4. Make casing at the hemline of the sleeves and at the neck and insert elastic into the casing.

How to do this: On one of the sleeves, fold under the hem allowance for casing leaving a 2-inch gap to insert the elastic. Using a safety pin, insert a 0.25-inch-width elastic into the casing through the gap.


The length of the elastic should be 1 or 2 inches lesser than the sleeve round at hem. I have marked the length needed (can you see the blue mark on the elastic in the photo below).


Pin the elastic to a safety pin. Feed the elastic through the entire casing, while holding the safety pin tightly while moving it through the casing.


When you get to the other end, take off the safety pin and overlap the two ends of the elastic. Sew two or three rows of stitches to hold the elastic ends in place. Then snip off the excess elastic and close the opening in the casing by folding under and then hemming. Repeat this for the other sleeve as well as the neck. Lastly, finish all the seams.


Step 5. Hem the bottom of the blouse and attach trimmings like laces and ribbons (if you prefer):


That's it! Done. Easy, ain't it? Please leave your comments and questions in the comments section under this post. I will be happy to answer.

You can find lots of free PDF printable sewing patterns on this page on my blog. You can download and use them to create your own clothes.

You can also click the Free Sewing Patterns Page at the top of this blog page (under the blog title) to find more free sewing patterns.

Click the below links to browse through all the pattern drafting and sewing tutorials on my blog.